No Roll Sourdough Discard Crackers

This super easy recipe for sourdough discard crackers is the perfect solution for leftover sourdough discard. If you’re one of those cool kids who ends up with lots of discard in your fridge and you don’t know what to do with it – you’re in the right place!
(As an Amazon Associate I earn from qualifying purchases. This means that if you purchase an item via a link on my website I earn a small commission at no extra cost to you.)
What I love about this recipe is how very easy it is. I just toss some melted butter and a little salt in my discard and spread it on parchment paper. It bakes for a longer time at a lower temperature to dry out the crackers and give them their crisp – but that’s hands free baking time!
Just break the crackers apart when they cool and they’re ready to eat! SO easy. Did I mention that it’s easy??
Before we hop right into the recipe, let’s talk a little bit about sourdough discard.
What is sourdough discard?
Sourdough discard can also be called “unfed starter” in recipes. An active, fed starter is bubbly and has reached twice the height of when it was first fed. Discard is usually flatter and less bubbly because all those good bacteria have “eaten” the flour that you fed to your starter.
Each time a starter is fed, it’s important to remove some of it first. Otherwise you would need to feed it more flour each time for the bacteria to have enough food. You’d wind up with a huge amount of starter, more than you could even think of using!
Simply using some of your starter to bake a loaf of sourdough bread can work, but if you’re just keeping your starter fed until the next time you bake, you’ll need to find something else to do with the discard.
Most people I’ve spoken to don’t like the idea of wasting so much good flour by discarding their leftover starter. I’m the same way. This is why recipes which call for sourdough discard or “unfed” starter are a great way to put your leftovers to good use!
What can you do with sourdough discard?
Lots of things! You can find tons of recipes around that use sourdough discard as an ingredient, but you can also fry it up on its own, make these wonderful crackers we’ll be talking about in a moment, and worst case scenario – you can compost it!
Is sourdough discard healthy?
YES! Sourdough discard is very healthy. It’s full of good bacteria that are great for your gut health. When grains have been fermented, the glycemic index of the flour reduces as well, which makes it easier on your blood sugar.
It’s great to add to recipes as an ingredient to get the benefits of some fermented grains in your recipe, but long-fermented recipes are my preference because they’re easiest on my digestion. If you struggle with any wheat intolerance, sourdough may be a good solution. Anyone with Celiac Disease, however, should still stay away from sourdough made from flours with gluten. The fermentation does not remove gluten.
How long does sourdough discard last?
At room temperature, discard will last one to two days before it gets very, very sour. It won’t be dangerous to eat, but the flavor will be VERY strong. In the fridge, sourdough discard can last up to two weeks and still be usable in recipes.
I have heard anecdotes from folks whose sourdough starters remained in their refrigerators for months at a time, and they were able to revive them after a few feedings. They are very hardy! Do not use your starter, however, if it has mold on it or if it has orange or pink streaks in it. Orange and pink streaks mean that bad bacteria have taken over your starter and you’ll need to either purchase or make a new one.

What equipment do I need?
The great news is that this recipe is very low maintenance. You will need:
- Mixing bowl
- Wooden spoon (or other spoon for mixing the batter)
- Measuring cups and spoons
- An offset spatula (also called an icing spatula)
- Baking Sheet
- Parchment Paper
Recipe Notes
This recipe calls for melted butter, but you can replace it with another oil if you wish. I use butter because I enjoy its flavor more. If you’re making a more plainly flavored cracker, make sure the oil you use is one whose flavor you enjoy. If you season your cracker heavily, however, the oil flavor won’t matter as much.
For cold refrigerated discard, it may be wise to let it come closer to room temperature before adding the butter. The butter can solidify and fail to mix well if the discard is too cold. This isn’t going to ruin the recipe, but you will have an easier time incorporating the butter if the discard is closer to room temperature. This is obviously not a concern if you’re using a different oil!

Divide the batter in half and spread each half onto a parchment paper covered baking sheet using an offset spatula. Make sure you spread it very thin. You want to almost see the parchment through the batter. When I’ve made these crackers too thick they end up with a very chewy texture. They were still edible and tasty, but they were not as nice to eat.
I like to do things the easy way (if you hadn’t noticed) and just break up the crackers after they have cooled completely. It gives them a more rustic look and I don’t have to work as hard. If you prefer a more controlled shape, you can gently score them after they’ve baked for about 15 minutes, then break them apart after they cool completely.
Sometimes I’m not perfect (shocker, I know) and I don’t spread the batter evenly enough. When that happens I might break off the portions of cracker that are done baking and put the tray back in for 5 more minutes to finish the rest of it. That way I avoid burnt cracker edges.

Keep an eye on your crackers as they bake. Not all ovens are the same, so yours may cook faster than mine!
These crackers can be stored up to a week in an airtight container. I find, though, that they’re best the day I make them. I will actually be impressed if they last in your house for longer than a day. It’s hard to stop once you start.
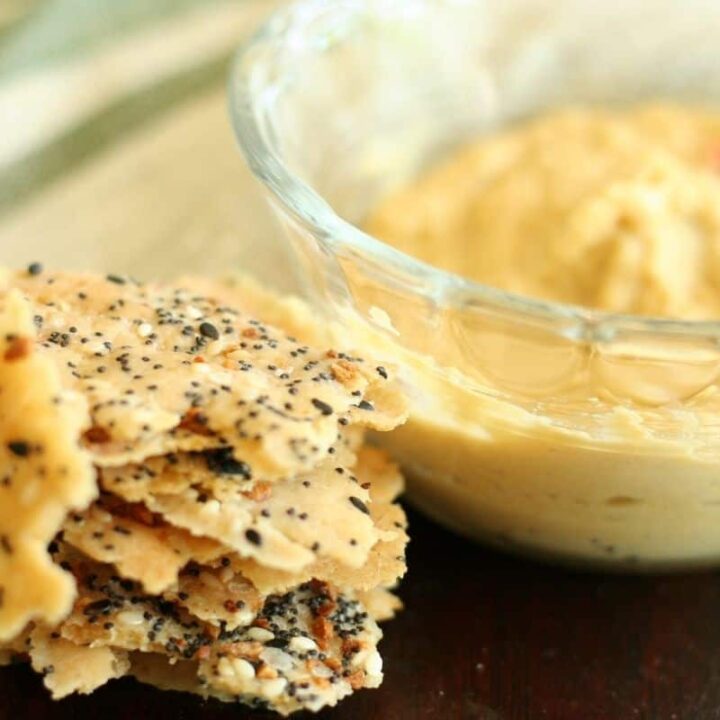
Serve with hummus, baba ganoush, cheese and charcuterie board, or just eat them by themselves!
Cracker Variations
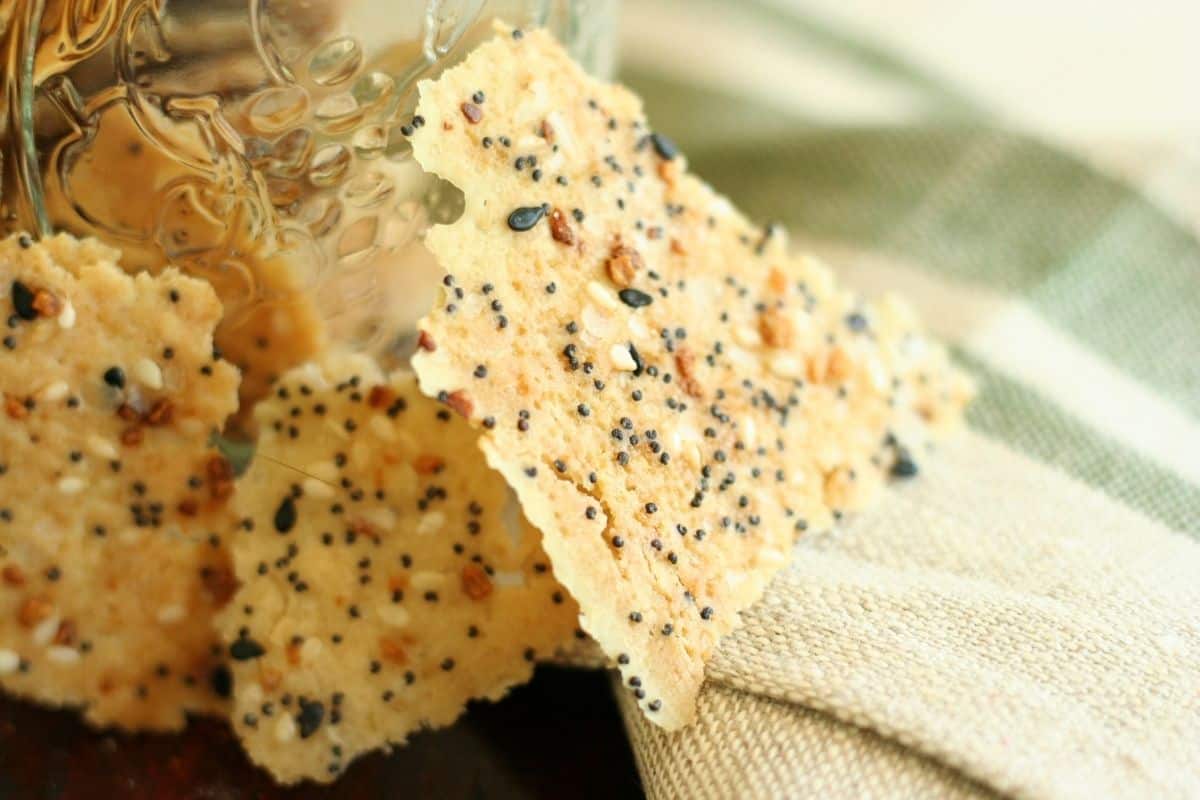
There are a lot of options for seasoning. I like to sprinkle the top with everything bagel seasoning. You can also add dried herbs or seasonings you enjoy to the batter itself, then lightly salt the top right after baking. If you like a cheesy cracker, you can add hard cheeses as well. (Don’t add soft cheeses, or the crackers won’t crisp up.)
For a sweeter cracker, you can brush the warm crackers with some honey and sprinkle with sesame seeds. For a Mexican theme, you could add a little taco seasoning to the batter, then dip your finished crackers in some queso dip. The options are endless!!

Ideas for Seasoning:
- Lemon zest and Rosemary
- Italian Herb Blend – basil, oregano, parsley, etc
- Fresh herbs – rosemary, thyme, sage, chives
- Spices – zaatar, pepper, chili flakes, garlic powder, paprika, coriander
- Seeds – fennel, sesame, poppy, nigella
- Finely chopped nuts

No-Roll Sourdough Discard Crackers
These deliciously addictive sourdough discard crackers are quick and easy to make. The perfect solution for your leftover discard!
Ingredients
- 1 c. unfed sourdough starter (discard)
- 3. Tbsp. melted butter
- 1/2 tsp. fine sea salt
- 2 Tbsp Everything Bagel Seasoning (optional)
Instructions
- Preheat oven to 300 degrees Fahrenheit
- Mix melted butter into room temperature discard starter.
- Add salt and mix well.
- Spread thinly over parchment paper covered baking sheet with an offset spatula, then sprinkle with seasoning.
- Bake until golden brown, about 35 minutes. Begin checking at 25 minutes so the crackers don't overbake.
- Let crackers cool for ten minutes after removing them from the oven. Break them apart into cracker-sized pieces.
- Enjoy!
Notes
Be sure to spread the batter very thinly. If the batter is too thick, the final result will be chewy rather than crisp.
These crackers can go in a lot of different flavor directions. You can make a simple cracker and just top with some flaked sea salt, or you could use any combination of herbs, seasonings, hard cheese, seeds, or nuts to make them whatever you want them to be. Have fun experimenting!
Nutrition Information:
Yield: 6 Serving Size: 10 crackersAmount Per Serving: Calories: 79Total Fat: 2gSodium: 2995mgCarbohydrates: 66gSugar: 0gProtein: 9g
If you liked this recipe, please leave a review or a note in the comments to let me know what you think. Happy baking!


I just made these. They were simple yeat super flavourful. Thank you for the recipe, the variation ideas and how to adapt it for my vegan friends.
Hi Julia – I’m so glad you enjoyed them! Thanks for visiting. 🙂
Made this just today! They are so good! Not to mentions how heavenly the house smelled while they were baking! Thank you for sharing!
I’m so glad you enjoyed them Andrea! I love the way they smell too. I just wish they lasted longer…we polish them off within an hour!
I just took some starter the other day and used whole wheat flour when I fed it. I am going to make these and sprinkle with cinnamon sugar, I think. Thanks – looks so simple!
Hi Shelley! Whole wheat can work great for starter. That sounds delicious! I hope they turn out well for you. They are simple to make – that’s why I love them!
Making these for the weekend!
Made these tonight. I used rosemary dill and basil in mine. Delicious but took way longer than 35 minutes for me.
I made these for the first time today. I accidentally made them too thick. I broke apart as best I could and finished in the air fryer at 350 until golden brown (all pieces were different). So good!!
That’s a great idea to finish them off in the air fryer! Glad they turned out well for you. 🙂
Would this recipe work for rye starter discard?
Hi Andrea – I have never made it with rye discard myself, but I don’t see any reason why it wouldn’t. If you give it a try, let me know how it turns out!!
Just made these….delicious! My husband has eaten almost all of them. Will definitely make again and try different toppings! So easy to make. Thank you!
Wow!! These were so delicious! It’s hard to find a discard recipe that is simple aside from flatbread lol. I am so happy to have found this. My whole family will enjoy, especially with all the variations. Thank you!!
Cristina, I am so glad you’re enjoying them! I am all about simple – especially with snacks that are inevitably eaten quickly. 🙂
Ohhhhhh my! I just made these and they are sooooo good! I sprinkled mine with dried rosemary and it’s incredible! Thanks for this recipe!
These crackers are amazing! To get uniform shapes, I took the pan out of the oven at 10 minutes and scored them lightly into squares, then finished up the bake. Delicious!
I’m loving this recipe! So simple and adjustable. I’ve got two batches going at once. On both, I swapped out butter for Avocado oil. I’m using Everything but the Bagel and the other I seasoned with Tajin for the spice and lime taste. They seemed to be drying slowly so I’ve switched to stove over to Air Fry mode. Doing great thus far, and delicious!!
I’ve made these with your recipe before and they were a hit by everyone who tried them. I just made another batch and had a difficult time removing the parchment paper. Can you think of what I might have done wrong? Flavor is still great
I’m glad to hear that scoring worked well for you!
That sounds great, Jeannine! How do you like the avocado oil? I’ve seen a lot of readers using their air fryers and it seems to work well!
I’m so glad you like them! I haven’t ever had any trouble with them sticking, but I have a couple of thoughts. First, did you leave them to cool a long time? Maybe they had too much time to get friendly with one another. 🙂 Second, did you use a different brand of parchment paper than you did the last time you made them? A couple shots in the dark, but they’re the first thing that popped to mind! Usually the fat content in these keeps them safe from sticking in my own experience. Let me know if you figure it out!!
I’ve just made them super easy and I sprinkle some chilli powder and dried herbs ,fantastic.
Only I think didn’t spread ghe batter evenly as corners got brown and crisp but middle part was better ,oh well next time I know better.
Hi Mina – thanks for sharing your toppings! Sounds delicious. It’s really hard to spread the batter evenly, I still always have browner edges! I love the flavor when that happens, though, so it’s like an extra bonus. 🙂
Made these tonight- they didn’t get golden brown from 35 mins on 300… so currently letting them bake a bit longer. Hope they turn out
Hi Aaliyah – usually when this happens it can be because the batter wasn’t spread thin enough. Don’t give up even if this batch doesn’t turn out!! They’re so tasty.
This came out amazing. I doubled recipe and this will be my go to sourdough cracker recipe. Easy no rolling. Fantastic
Can I use olive oil instead of butter?
I’m so glad the recipe worked well for you, Lisa! The no-roll aspect is what I love most about it too.
Yes, Kathy, you can! I use butter because I prefer the flavor, but you can substitute it with any oil you enjoy the flavor of.
I have made these two days in a row- they are that good! I used a jalapeño everything bagel seasoning from Aldi on the second batch which is our favorite. One note of caution. Some seasonings have more sodium than you might expect. If you aren’t sure, omit the salt in the discard as you can always sprinkle with extra if needed.
Great suggestion, Laurie! I know I have used seasoning with too much salt in it before, and I bet omitting the salt in the cracker itself would help.
Excellent and easy! I did cut the salt WAY back cuz I was using EBS. Very tasty, good nutritional values. Thank you❤️
Mine totally stuck to the parchment 🙁
All I can say is WOW! These were stupid easy and absolutely delicious. I topped mine with pumpkin, sesame & poppy seeds and hemp hearts. No extra salt as I used salted butter and sea salt in the actual cracker. This was super quick and easy. Thanks for one of the best things I’ve used my sourdough discard for to date…
My edges were nice and crispy but my centers were softer. When they cooled a little I broke of the crispy edges and put the softer parts in the warm oven. I left for 20 minutes and perfectly crispy.
Love love love these crackers!!!
Will these stay crisp stored? If so, what is the best way to store them. Thanks
I just made this recipe but added parmesan and I think the parmesan made them too greasy and did not turn out crisp. When you say you split the batter in two does that mean two baking sheets spread thin? Thanks ahead of time for the help.
My favorite discard recipe! Thank you!
Marion
Just wondering if foil would work as well to line the pan as parchment. I’m short on parchment. I am making your discard crackers. They look great. appreciate your site.
You can use foil, but you want to bear in mind that it isn’t non-stick. I wouldn’t expect these crackers to stick because of their higher fat content, but it’s a possibility. Foil is also reflective so it’s possible the crackers could cook more quickly, so I would check them more frequently to see how they’re cooking!
I just made these crackers and they are so delicious! I added 2T grated parmesan cheese (not the powdered kind) and 2T of cheddar cheese and 1t of nutritional yeast. I reduced the butter to 3T because I figured the cheese would add additional oil to the recipe. I baked them at 325. After 15 minutes in the oven, I scored them with a pizza cutter. After another 15 minutes, I rotated the crackers on the edge into the middle of the pan, and the ones from the inside to the edges of the pan for even browning/crisping. And I think my total bake time was around 45 minutes. They are so good! Way easier than rolling dough!!
These are yummy and so easy to make!!! I wonder if I can I use beef tallow instead of butter? I just made a batch and am going to try it. Just wondering if anyone has tried it yet.
It’s worth a try! I love the flavor the butter gives them, but I’ve never tried with tallow. Let us know how it goes!
Love this recipe. My kids love these crackers. But the macros completely off. With high protein bread flour, logging is into MyFitnessPal logs this around 122 cals, 15g carbs and 2g protein.
Thanks for sharing. I did find them a bit too sour. Is there a way to make them less sour? By adding some sugar maybe?
Thank you for this recipe! I have made it many times, w a variety of toppings. I have a pan in the oven right now, sprinkled w Icelandic salt and caraway seeds. Can’t wait for it to be done!
Usually the sourness is going to be determined by your starter, and how long you’ve had your discard. A fresher starter is usually going to give a less sour taste, whereas the jar of discarded starter that’s been in the back of the fridge for several weeks – is likely going to be quite sour!