Delicious & Flaky Cast Iron Biscuits

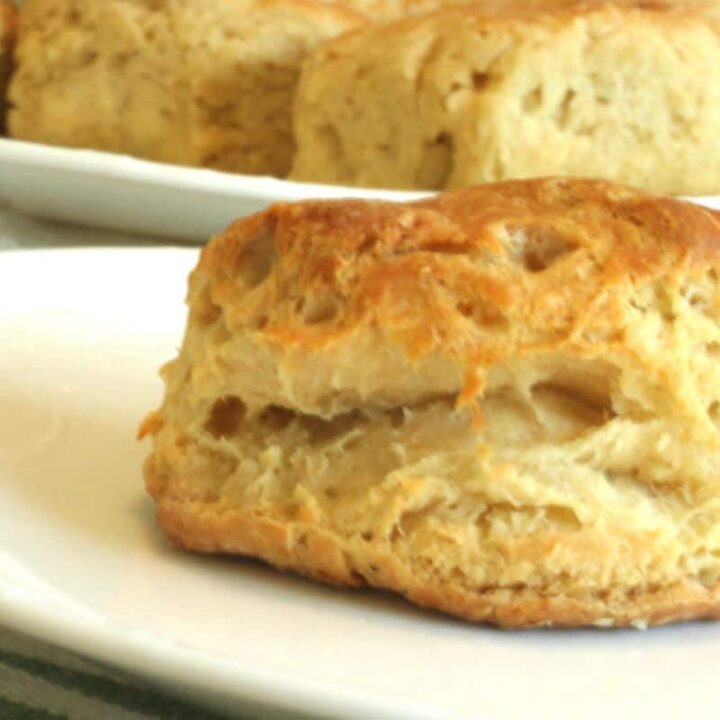
These delicious, buttery cast iron biscuits mix up quickly and bake in a cast iron skillet for an extra crisp on the top and bottom. They are the perfect side for soup in the cooler months, and they’re ideal for strawberry shortcake in summer. I love to eat them fresh out of the oven with some butter and homemade jam!
(As an Amazon Associate I earn from qualifying purchases. This means that if you purchase an item via a link on my website I earn a small commission at no extra cost to you.)
Supplies Needed
- Mixing Bowl
- Measuring cups & spoons
- Pastry blender or cheese grater
- Wooden Spoon
- Rolling Pin
- Biscuit Cutter (In a pinch, you can use the top of a drinking glass!)
- Cast Iron Skillet or Griddle
- Optional: Pastry brush
Ingredients
- Flour
- Baking Soda
- Baking Powder
- Fine Sea Salt
- Butter
- Buttermilk
- Optional: Melted butter for brushing
Important Notes for Mixing
It’s essential for this recipe to keep the ingredients cold. Cold butter melts in the oven and turns into steam – and the steam forces the layers of dough apart to create layers. If the butter becomes too warm it can incorporate into the biscuit dough instead, creating a more cakey result. Still tasty probably – but not exactly what we’re after.
Before mixing my ingredients, I put the measured flour in the fridge for about a half an hour. I use a pastry cutter to cut the butter into the flour mixture, but another option is to freeze your butter and grate it in. I haven’t noticed a significant difference between these two methods.
The biggest key is to keep everything cold and handle it with your hands as little as possible. Mix with a wooden spoon, and roll out with a rolling pin. I have sometimes put the uncooked cut biscuits in the fridge before baking as well, if I feel the dough may have gotten too warm.
Lastly, be sure not to overmix your biscuit dough. Not only will it incorporate the butter too much, it will also develop the gluten in the flour. Your result will be tough and chewy instead of tender and crumbly. Mix until JUST combined!

Why Buttermilk?
Not only is buttermilk a great opportunity to incorporate a fermented ingredient for gut health benefits, it’s necessary for helping the biscuit to rise. Some recipes will use regular milk instead, and those recipes will usually use baking powder only.
The acidity in the buttermilk reacts with the baking soda and creates carbon dioxide gas, which gives the biscuits a beautiful rise.
What If I Don’t Have Any Buttermilk On Hand?
The good news is, if you have milk and lemon juice or vinegar on hand, you can make your own buttermilk in five minutes. For every 1 cup of milk, add 1 Tbsp of either lemon juice or vinegar and let sit for five minutes. It will curdle the milk and create buttermilk!
Cutting And Baking
When you’re cutting out your biscuits, be sure you don’t twist your biscuit cutter. Twisting the cutter causing the layers to seal and it inhibits the rise of the biscuit in the oven. Straight down, straight back up!

I always bake these biscuits touching (called a batch bake) because I love the soft sides and crispy top and bottom. If you like the biscuit to be crispy on all sides instead, then you will need to bake fewer at a time so they don’t touch in the skillet.
How Long Do These Biscuits Stay Fresh?
I recommend you only bake as many as you want to eat right away. You can store biscuits for several days and they won’t go bad, but after the first day they just don’t taste as good to me.
If you do store them longer and you want them hot, you can re-heat them in a 350 oven for 3-5 minutes in the cast iron skillet. You can also reheat them in the toaster but it makes a crumbly mess. It will also crisp them up a bit, so if you want a softer biscuit it’s not an ideal option.
The Method
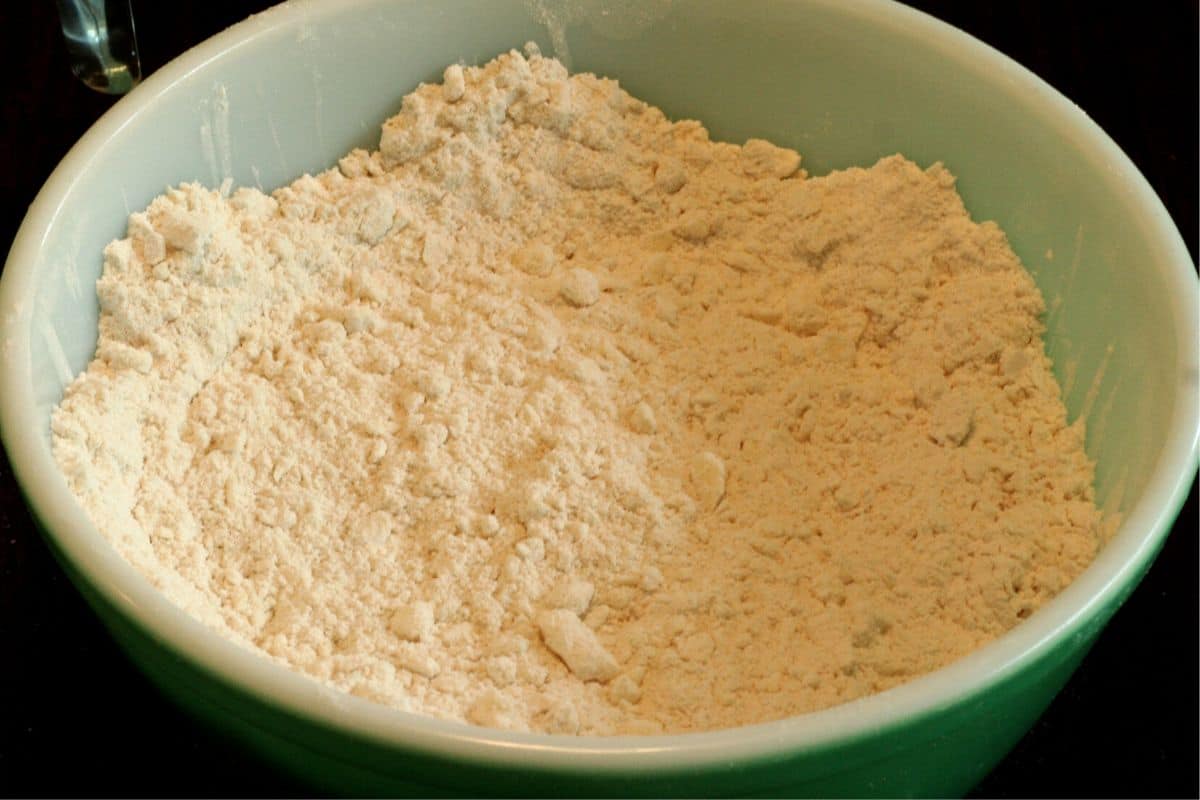
Mix your dry ingredients well in a large mixing bowl. You can put them in the fridge for a half hour to ensure your butter stays cold, but this is not required. Cut butter into dry ingredient mixture until butter pieces are pea-sized and mixture is crumbly (see below).

Pour buttermilk in and mix with wooden spoon until JUST incorporated. The mixture will be wet, and that’s okay!
Generously flour your rolling area and pour the dough onto the floured surface. Knead 2-3 times with your hands to get rid of any extra stickiness. Roll dough to 3/4 inch thickness and cut biscuits with a cutter approximately 3 to 3 1/2 inches in diameter.
Re-roll extra biscuit dough to cut more biscuits out until there is no more dough. Place biscuits in well-seasoned cast iron skillet. You can baste the biscuit tops with melted butter before baking if you wish. Bake at 425F for 15-17 minutes until tops are golden brown and the biscuits are baked through.

Remove biscuits from skillet promptly so the bottoms don’t get overcooked. Cast iron retains heat for a long time, and it will keep cooking your biscuits if you don’t get them out of there!
Is your cast iron skillet rusty? Check out my post on how to remove rust from cast iron so you can make good use of a great kitchen tool!
Frequently Asked Questions
Can I use milk instead of buttermilk?
I don’t recommend this. As we discussed before, the acidity in the buttermilk reacts with the rising agents (baking powder/baking soda). Milk will give you a tasty enough biscuit but the result won’t be as fluffy or special. If you do decide to use milk, however, you will need 3x the amount of baking powder to replace the baking soda in this recipe. Therefore, 1 1/2 cups of milk (instead of buttermilk) and 2 Tbsp baking powder. Eliminate the baking soda altogether.
How do I make my own buttermilk?
As stated above – For every 1 cup of milk, add 1 Tbsp of either lemon juice or vinegar and let sit for five minutes until the milk curdles.
Why baking soda AND baking powder?
Because we’re using buttermilk, we need the baking soda to react with the acidity in the buttermilk to create carbon dioxide. Baking powder does not need to be mixed with an acidic ingredient to make it work. It contains baking soda and another acid in powder form (usually cream of tartar). It is capable of leavening a baked good all by itself, like cookies or vanilla cake for example. You generally use roughly 3x as much baking powder as you would use baking soda. When we mix them both, we’re using the baking soda to balance out the acidity in the recipe (the buttermilk in this case) and we’re using the baking powder for some extra lift in the oven.
Can I cook my biscuits on the stovetop?
Yes! This is super cool, because you can cook them if you lose electriciy but you have a gas stove. If you love to go camping, you can cook these in your cast iron over the fire! Lots of options.
Set your burner at a low or medium-low heat. You will need to cook them for a fairly long time on each side (at least five minutes) to cook them all the way through. If your heat is too high, they will burn on the outside and be raw in the middle. You may need to sacrifice the first biscuit to get your burner temperature right! My advice is to start lower and turn up slightly if they aren’t cooking.

What are the Different Ways to Serve these Biscuits?
These biscuits are very flavorful and are fantastic on their own with a little butter or jam and a cup of tea. They’re a favorite side to serve with soup in the winter, and they’re great for breakfast with a sausage gravy.
I’ve used them for egg and sausage breakfast sandwiches, or for lunch with chicken or egg salad as well. My kids also love to grab them from the bread box and eat them plain for a quick snack. It does lead to some trailing crumbs, but if those babies can feed themselves without my help, I’ll take the crumbs. 🙂
Can I freeze these biscuits?
Yes! The biscuits will last in the freezer for 2-3 months, and you can reheat them in a cast iron skillet at 350F for 10-15 minutes until warmed through.
You can also freeze the un-used biscuit dough and bake another day!

Flaky Cast Iron Biscuits
These delicious, buttery cast iron biscuits mix up quickly and bake in a cast iron skillet for a crisp and flaky result.
Ingredients
- 3 1/2 cups flour
- 1 Tbsp Baking Powder
- 1 tsp Baking Soda
- 1 1/2 tsp Fine Sea Salt
- 3/4 cups butter (1 1/2 sticks)
- 1 1/2 cups buttermilk
Instructions
- Preheat oven to 425F.
- Mix flour, baking powder, baking soda and salt thoroughly with a fork or pastry cutter.
- (Optional) Let flour mixture chill in the refrigerator for 30 minutes
- Cut cold butter into flour mixture until butter forms pea-sized crumbs.
- Pour cold buttermilk into mixture and stir until just combined.
- Pour dough out onto generously floured surface and knead 2-3 times until dough is ready to roll.
- Roll dough out with a rolling pin to 3/4 inch thickness.
- Use a 3-inch biscuit cutter to cut out biscuits. Re-roll dough as needed until you have used it all.
- Place biscuits in a well-seasoned cast iron skillet and bake at 425F for 15-17 minutes until golden brown and cooked through.
- Remove biscuits promptly and enjoy!
Notes
If you do not have buttermilk, you can make buttermilk by mixing 1 1/2 cups of milk with 1 1/2 Tbsp of lemon juice or vinegar and letting it sit for five minutes until it curdles.
For best results, use buttermilk. If you would rather use milk, then replace the 1 tsp of baking soda in the recipe with an additional 1 Tbsp of baking powder.
Keep ingredients as cold as possible to allow the biscuit to flake well. Additional chilling time and handling as little as possible are good ways to create a more flaky result.
Mix dough as little as possible to prevent butter from incorporating into the dough and to keep the gluten in the flour from developing. This will ensure a crumbly and flaky result.
Best results when made with unsalted butter. If you use salted butter, reduce added salt to 1 tsp.
Be sure to cut biscuits without twisting the cutter. Twisting will seal the sides and prevent the layers from rising.
Remove finished biscuits from skillet promptly so the bottoms don't burn. Cast iron retains heat for a long time and will continue to cook your biscuits if you don't remove them.
Nutrition Information:
Yield: 12 Serving Size: 1 BiscuitAmount Per Serving: Calories: 246Total Fat: 12gSodium: 525mgCarbohydrates: 30gSugar: 1gProtein: 5g
If you enjoyed this recipe, please leave a rating or a note in the comments to let me know how it went!


I’ve made these biscuits and Bonnie’s sweet biscuits with only one small change – I’m at sea level so I added extra baking powder. Both turned out AMAZING! My husband said these were the best biscuits he’s had since his Granny passed over 40 years ago.
I am so glad they turned out well for you, Ayshea! I am honored to be compared favorably with Granny. 🙂 Happy baking!
I have the absolute worst luck making biscuits. Every time they are closer to hockey pucks rather than layered biscuits. These turned out AWESOME!!! Thank you for this recipe! (My husband thanks you, too!!)
I am SO happy to hear this, Janine! I hope this recipe with be with you all for a long time. 🙂 Enjoy!!
Thank you actually have a cast iron biscuit pan.Love it has never failed .
That’s wonderful, Kim! Is it a new pan or did you inherit it?
I made these this morning and served them with sausage patties and gravy. My husband filled his plate, and before I sat down with mine, he was raving about them. I’ve tried a lot of biscuit recipes in my 74 years, but this is the best. The biscuits have crispy edges, are flaky and soft inside, and the taste is exactly how you’d expect a great biscuit to taste. And I got exactly 12 biscuits. Your recipe is perfect as written – I won’t change a thing!
Thank you Linda, that’s so kind. I’m glad you love them!
Wonderful recipe! Even at high altitude (Colorado) they came out amazing. Perfect for a snowy day!❄️
I’m so glad it worked well for you Monica!
Wow! I have hunted for a perfect biscuit recipe for so long.
I love my cast iron so this time I found your recipe. It was fabulous!!!
I cut it in half and it made the perfect amount for my hubby and I.
I have saved and already passed to my son.
Loved it!!
Can you make them and not cook and freeze for a later time?
These are sooo good! Better than any restaurant’s biscuits. Thank you for the recipe!!
Hi Laurie – I have never frozen the dough (although I have frozen the cooked biscuits and that turns out fine) but another reader said she froze half the dough to make later, and they turned out even better the second time. I’d say it’s safe to give it a go!
Thank you so much! I’m so glad it’s working well for you.
Anxious to try these. I want to use self-raising flour. Do you know if they would be the same? Thanks!
Hi Beckie – self-rising flour is really just flour with some baking powder (and a little salt) already added. If you use it, I would suggest eliminating the added baking powder in the recipe. You may find, though, that the flavor of the raising agent comes through in the biscuit, because there’s about 1.5 teaspoons of baking powder in every cup of self-rising flour – and this recipe uses baking soda as well. My suggestion would be to stick with the all-purpose flour, or possibly experiment with eliminating all the raising agents in this recipe and seeing what happens with the rise on the biscuits without it. I’ve never tried this, though, so proceed with caution. 😉
Do you preheat the skillet before putting the biscuits in it? Do you need any sort of butter or oil in the skillet?
I’m going to give these a try. One question though, can.I make the dough tonight and put it in the fridge until tomorrow morning?
Yes – you absolutely can!
This is actually one of only a few recipes I make in cast iron where I do not pre-heat the skillet. I’m trying to keep the butter as cold as I can for as long as I can in order to ensure the flakiest result – and a hot pan will melt the butter prematurely. This is why I call for a well-seasoned skillet for this recipe. I do not oil the pan, but the butter content in the biscuit along with the seasoned finish of my skillet ensure my biscuits don’t stick.
I came across your recipe but was looking for one that uses lard instead of butter. I love the idea of using the cast iron skillet. I’m gonna give it a shot with lard. Also I use a can of powdered buttermilk that you mix with water. Have you used that before and what are your thoughts on it?
I haven’t ever used the powdered buttermilk, but I imagine it would work just as well. Let me know how they turned out for you!
Great recipe. Biscuits turned out amazing. Rave reviews from everyone. Thanks especially for the tip regarding substituting an extra Tbsp baking powder for the baking soda if not using buttermilk.
Great recipe, make them almost every week. Put a sausage patty and a piece of cheese then freeze them for a quick breakfast.
Great idea!!
Came out pretty well. Fluffy in the center but didn’t brown very well. Baked for about 22 minutes and did not even help to brown. Was still pretty pail. Checked my gas oven and temp was spot on. Did one in the toaster oven and came out perfect. Will use toaster oven or gas oven on regular baking pan only instead of cast-iron pan.
I’m glad you found an approach that worked! To get them to brown well in the oven you can try brushing them with melted butter, or try putting them closer to the top element.
For the recipe amounts listed, do you generally use a 10-in Skillet, or a 12?
Hi Jon – I usually use a 12-inch skillet for this recipe. Enjoy!