Perfect Crispy Cast Iron Roasted Chicken

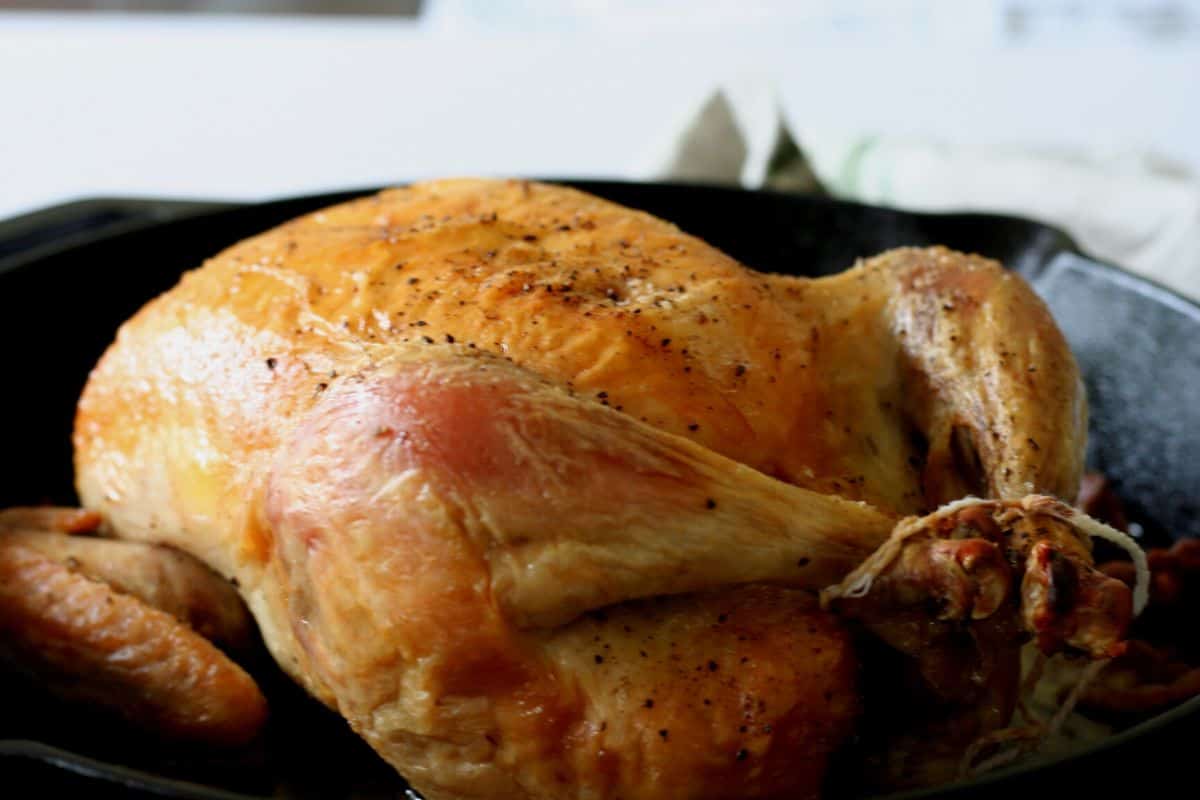
Learning how to cook a whole chicken is an indispensable skill for any from-scratch cook. This cast iron roasted chicken recipe is crispy and golden on the outside and tender and juicy on the inside. It’s never dry, and it’s always flavorful!
Cooking a whole chicken is a quick and easy way to throw a beautiful meal together for the family, and the leftovers give you SO many options. You can make chicken salad for sandwiches or use it in a soup or casserole, and the bones make richly nutritious broth.
It’s a great way to use the whole animal and not waste any of it. You can use the giblets to flavor the pan gravy and they provide extra nutrients. The bones cook up in a broth so you can suck out all the nutrients they have to offer too!
The broth can be used for soups and stews or to make rice, quinoa, gravy, or mashed potatoes. Bone broth makes a great drink when you’re sick too – lots of nutrients, and easy on the stomach.
Use up every last bit of that chicken!
(As an Amazon Associate I earn from qualifying purchases. This means that if you purchase an item via a link on my website I earn a small commission at no extra cost to you.)
Why Cast Iron as a Roasting Pan?
Cast iron is a super flexible option. It can be used to cook just about anything, whether on the stovetop or in the oven. It heats evenly, helps your dishes cook more evenly, and when seasoned well, it’s about as good a non-stick pan as you’ll find anywhere.
It’s great for roasting because it has the same thick walls and low sides as a roasting pan, but it can be used for far more. For minimalists, those with small kitchens, or those on a budget – it’s helpful to have an option that’s so versatile.
Sad to say, I still haven’t found a cast iron skillet that’s big enough to accommodate my Thanksgiving turkey. Not sure I’d want to lift that skillet with the turkey anyway! So you may still want to keep that big roasting pan stored away if you’re in charge of turkey for Thanksgiving dinner. 🙂
What Kind of Cast Iron Pan Should I Use?
My recommendation is to use a 12-inch skillet. You can also use one with dual handles if that’s easier for you to manipulate. You don’t need one with a lid because the chicken should be roasted uncovered to get that crispy skin.
Cast Iron Skillet Options

There is a lot of variety in cast iron! Enameled, pre-seasoned, polished, rusty old pan at the thrift shop, you name it. (By the way, check out my article if you want to get the rust off that awesome skillet you found at the thrift store!)
Enameled pans can be a great way to benefit from a non-stick surface and lower maintenance care – but make sure you invest in high quality. The cheaper varieties can begin to chip over time and you can end up with enamel in your food. No good.
The only enameled cast iron option I prefer using is a dutch oven for more liquid based things like soups and stews, and boiling pasta or potatoes. I have a raw cast iron dutch oven also that I use for roasts and bread.
I have a few older cast iron pans that, to my surprise, were much smoother than my newer ones. My newer ones have a more pebbly finish. I decided to dive into some research as to why that is.
When cast iron pans were first made, they were cast with a finer sand than they are now. This made them smoother. Older cast iron is also more lightweight than newer cast iron.
Around the mid 20th century, factory standards were changed due to the discovery that the fine sand was bad for workers’ lungs. Manufacturing switched to a courser sand option and finished pans had a rougher finish.
Don’t despair, however – if you prefer a smooth finish on your cast iron, there are some cast iron manufacturers who do still sell smooth cast iron. They go through a polishing process during manufacturing which makes the inside of the pan glossy and smooth.
If you’re looking for a smooth finish like Grandma’s antique cast iron pan, there are a few modern options that are more like the antiques you might find in a thrift shop. My recommendations would be Stargazer, Smithey, or the Field Company.
Modern cast iron that has a smooth finish is much more expensive, however. If you’re looking for that smooth finish you might do better to keep an eye out at yard sales and thrift shops. Then check out my article on how to remove rust from cast iron to restore it to its original beauty!
I use and enjoy both rough and smooth cast iron in my kitchen. I will say, however, that for foods that tend to stick (like eggs and fish) I prefer to cook them on my antique cast iron pieces.
Other Equipment Needed
Aside from a 12-inch cast iron skillet, you’ll need the following:
- Kitchen Twine – for trussing the bird before baking.
- Fine Mesh Strainer (if you’re making the pan gravy)
- Meat Thermometer
- Carving Knife
- Cutting Board – I recommend one that has a juice groove.
Ingredients and Substitutions
I keep my roast chicken very simple and low maintenance – there are days where I don’t even use the onion and garlic. There are also lots of ways to experiment with more flavors if you want. Think of these ingredients as your base, and you can add different flavor combinations and profiles as you like.
- 1 whole chicken (3-5 pounds)
- 1 large white onion
- 1 bulb of garlic
- Salt
- Melted butter
- Fresh ground black pepper
- Olive oil for the pan
I use a splash olive oil in the pan when I preheat to make sure I’m starting with the best non-stick surface I can. I season the bird thoroughly with salt and pepper after brushing it with melted butter. You can simply drizzle the chicken with more olive oil as well, but I prefer the flavor of butter.
I peel a bulb of garlic and put half inside the chicken cavity and half outside the chicken on the pan to roast and flavor the gravy. I do the same with the onion – half on the outside, half on the inside.
If you like to experiment with flavors, you can try different seasoning combinations on the outside of the bird, or you can stuff the inside with anything from apples and a stuffing to fresh parsley, rosemary, and lemon.
Think about the flavor profiles you enjoy and whether you’d prefer a darker more smoky flavor (try smoked paprika or topping the chicken with slices of bacon) or a fresher flavor (go with lemon and rosemary).
Cooking Method
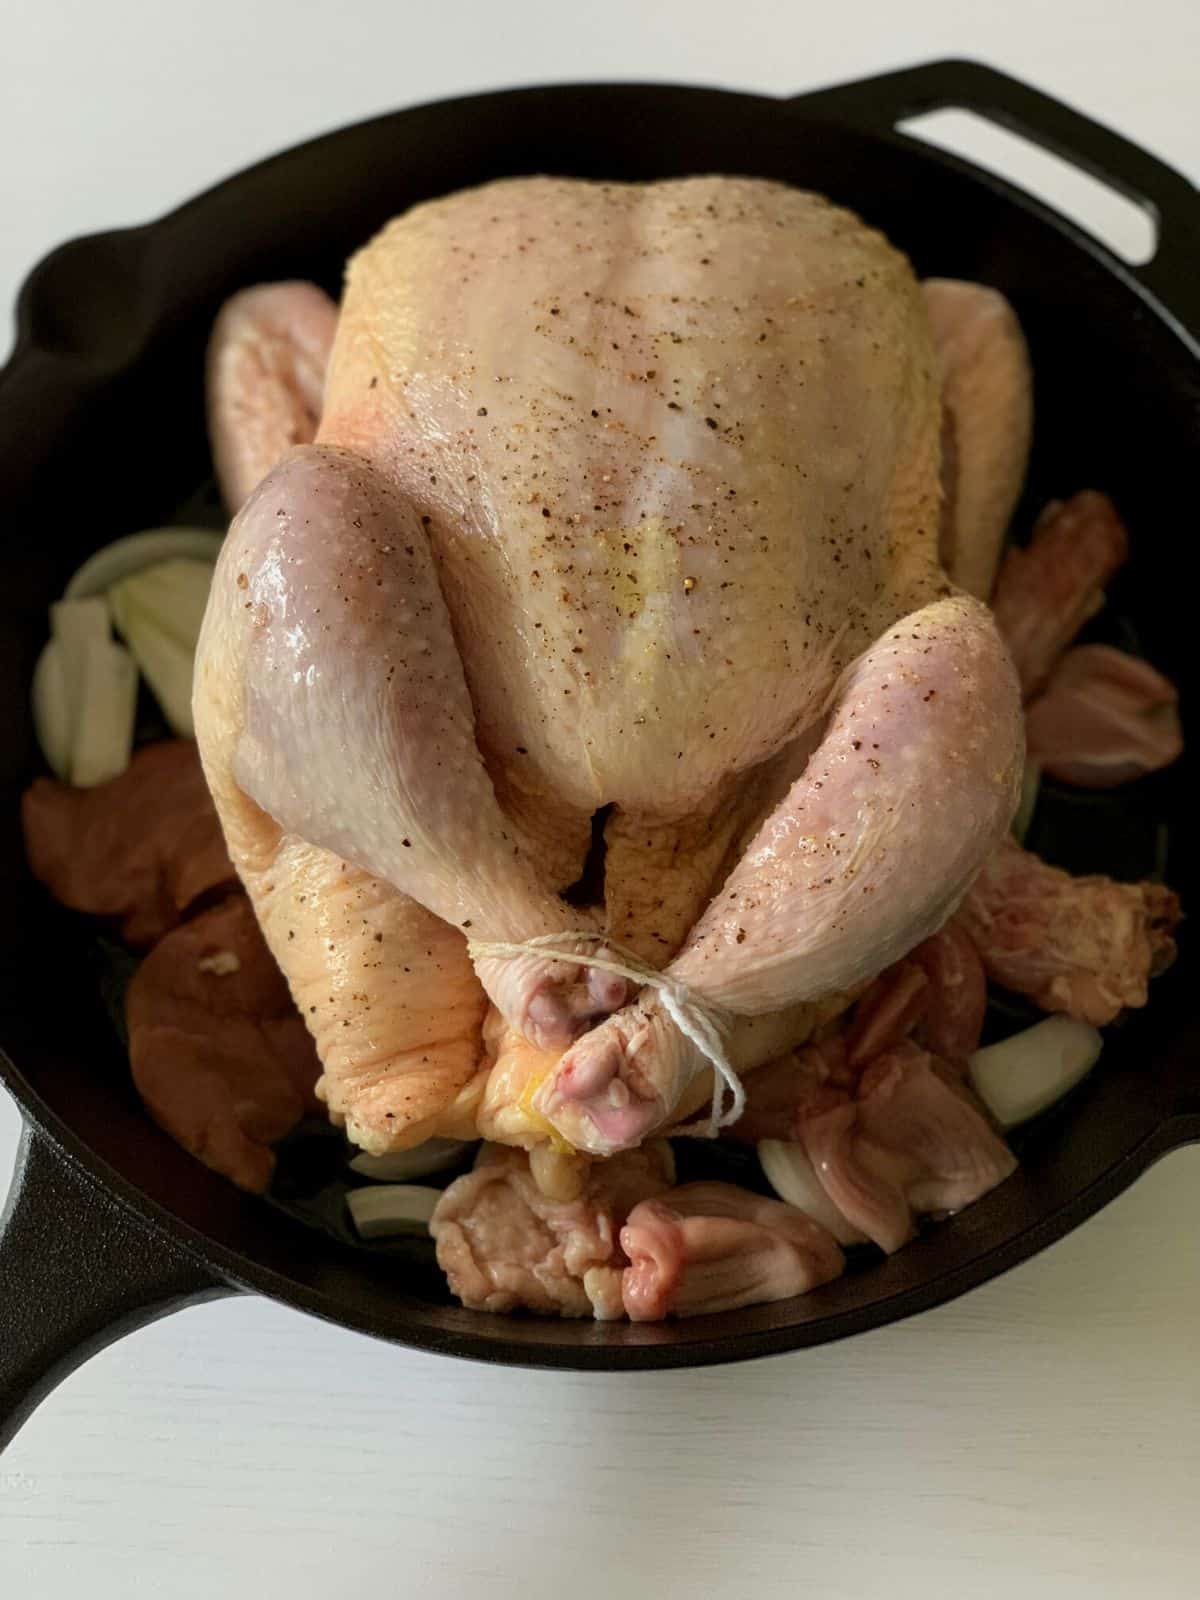
Make sure the chicken rests at room temperature for at least a half hour before you put it in the oven. This is a good opportunity not only to preheat your pan but also prepare any other ingredients you’ll be including.
While this recipe does call for onion and garlic, you can get a great-tasting chicken without them! All you really need is salt and pepper and a little oil.
Remove the giblets from the chicken and dry it thoroughly inside and outside. (Keep the giblets aside if you’d like to use them to flavor the pan gravy. I like to do this to take advantage of every last part of the bird.) Salt the chicken generously before letting it sit so the flavor can penetrate.
During this time, chop the onion and peel the garlic and make sure your lightly oiled pan is preheating in a 425 degree oven.
Dry the chicken again after it rests for 30 minutes, as condensation will have formed. Brush the chicken with melted butter and then season with salt and pepper.
Place half of the onion and half of the garlic inside the chicken cavity, and half of each onto the preheated skillet. Place chicken breast side up in the center of the skillet (don’t worry if it’s sitting on top of onion and garlic) and place giblets around the outside if desired.
Roast at 425 for about an hour with the breasts facing the back of the oven. The back of the oven is the hottest part, so facing the thickest part of the meat in that direction, you’ll get a more even roast.
You’ll be looking at 13-15 minutes of roasting time per pound on your chicken, so calculate your precise cook time according to its weight. The chicken is done when it’s golden and crispy on the outside and the temperature reads 165 degrees at the center of the breast or the thigh joint.
Let the chicken rest for at least 20 minutes before carving. This will keep the juices from running out and leaving your meat dry.
You can use the pan drippings to make a very tasty gravy if you have a little extra time!
Optional Pan Gravy
- After chicken is removed from the skillet, loosen stuck bits from the bottom of the pan and strain drippings.
- Return drippings to the pan and put on medium heat.
- Add 1 cup of chicken broth to the drippings and bring to a simmer.
- Mix 1/4 cup of broth with 2 Tbsp of flour to form a slurry. When drippings and broth are simmering, add the slurry very gradually, stirring constantly with a whisk, until mixture is thickened.
- Remove whole chicken from the packaging and dry thoroughly inside and outside.
- Salt generously all over the bird and let it rest for 30 minutes to an hour.
- Preheat 12-inch skillet drizzled lightly with olive oil in a 425 degree oven.
- Dry chicken again (condensation will have formed) and brush with melted butter and season again with salt and pepper.
While I don’t find that this gravy is necessary for tasty chicken, it does add a little something extra special to the meal when I take the time.
How to Carve a Roasted Chicken
After allowing the chicken to rest for at least 20 minutes, carving should be pretty easy! When it’s been well cooked, a chicken comes apart neatly and easily at the joints.
- Cut the quarters at the hip joint. They should come free easily. Each can then be cut into thighs and legs and provide four pieces.
- Next, find the center bone line across the top. Put your sharp knife just to the side of the center bone and press down gently. Do the same on the other side, and then remove the center bone. Breaking the ribs not only allows the meat to come free more easily, it also allows the marrow to release and provide lots of good nutrients in your bone broth.
- Carve gently along the bone to remove the breasts. The breasts are the last large pieces for serving. There is, however, a lot more meat that can still be picked off the bones!
I like to use those 6 main pieces to serve at dinner time, and then after we clean up dinner I pick the bones clean and chop up the leftovers from dinner. I put them in the fridge for the next day and make a bone broth from the bones.
Roasted Chicken Sides
I like to add a pan of sliced potato wedges tossed in olive oil and salt and pepper for the last half hour of the chicken’s roasting time. I steam some veggies stovetop while the chicken is in the oven so everything finishes at the same time.
You can also roast other root vegetables alongside your chicken so that everything finishes at the same time. Roasted sweet potatoes and brussels sprouts is one of our family’s favorite combinations. Take advantage of the oven being on for the chicken! Almost any vegetable my kids usually don’t want to eat is happily eaten after it’s been roasted with some oil and salt. 🙂
FAQ
Can you bake chicken in a cast iron pan?
YES. As I’ve discussed, cast iron is an ideal vehicle for roasting because of the easy stovetop to oven transition, and the way the pan heats evenly and retains heat well.
What temperature is best for roasting a chicken?
That depends on what you’re trying to do. If you want a crispy golden brown skin, I recommend 425 because it cooks the chicken the whole way through within an hour, gives a great crispy golden skin, and a juicy meat.
If you cook at a lower temperature, not only can the meat dry out with longer oven time, the skin won’t get very crispy. At a higher temperature you risk burning the outside before it’s cooked through.
Should you roast a chicken covered or uncovered?
Don’t cover it. If you need to speed up cooking time, you can tent the chicken in aluminum foil after 20 minutes. Be sure to leave it uncovered for at least 20 minutes in order to crisp the skin. A covered chicken won’t crisp up as well.
How do you keep a chicken from drying out during roasting?

Let the chicken sit at room temperature for 30 minutes before roasting. Be sure the skillet is hot before adding the chicken, and face the breasts to the back of the oven. Since the back is the hottest part, that will ensure your chicken cooks evenly so you don’t have to cook longer and risk drying some parts out.
Which herb goes best with chicken?
The most typical choices to use with chicken are probably rosemary or sage. You can also use oregano, thyme, marjoram, and tarragon. Smoked paprika is a recent favorite of our family.
While they are not herbs, using onion and garlic is always a good bet for flavoring a chicken.
How do you get seasoning to stick to chicken?
Pat the chicken fully dry before seasoning. I season it just with salt after patting it dry, then I pat it dry again after it sits 30 minutes.
At that point I lightly oil it with melted butter and then I lightly salt it again and add freshly ground black pepper the second time. With a dry chicken and only a light layer of oil, seasoning should not slide off.
How do you keep chicken moist?
Be sure to let the chicken rest for at LEAST 15 minutes after roasting so that you don’t allow all the juices to run out and leave your meat dry. That’s the biggest thing. I also recommend that you let the chicken cook with the breasts facing the back of the oven. The chicken can cook through a little faster and it’s less likely that the meat will dry before the breasts are cooked through.
Generous salting can also help the chicken retain its juices.
Funny story. The first time I roasted a chicken, I accidentally roasted it upside down! While it was disappointing that I couldn’t enjoy the crispy skin on the chicken breasts, they might have been the juiciest ones I ever ate. So hey…maybe try roasting your chicken upside down if you want that super juicy chicken breast! Ha!
How long should you let seasoning sit on chicken?
I like for the initial layer of salt to sit on the chicken while it rests, at least 30 minutes. After the rest, however, I don’t let the chicken sit again after I’ve oiled it and seasoned it before putting it in the oven.
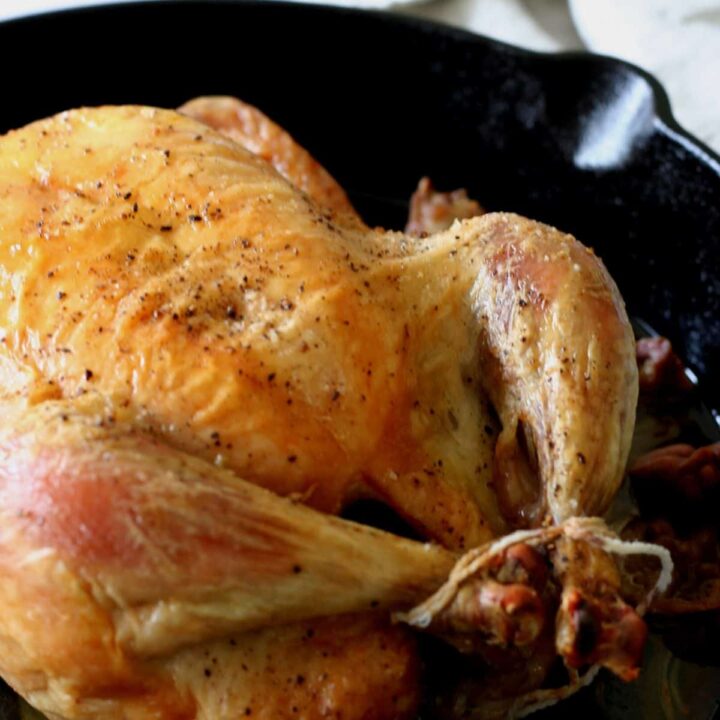
Cast Iron Roasted Chicken
This simple roast chicken recipe is cooked in a cast iron skillet. It turns out crispy on the outside and juicy on the inside every time!
Ingredients
- 1 whole chicken (3-5 pounds)
- 1 large white onion
- 1 bulb of garlic
- 1.5 Tbsp Salt
- 2 Tbsp Melted butter
- 1/4 tsp freshly ground black pepper
- Splash of olive oil for the pan
Instructions
- Remove chicken from packaging and remove giblets. (Set aside for pan gravy if desired.)
- Pat chicken completely dry on the inside and the outside, and season generously with salt.
- Let chicken rest for 30-45 minutes.
- Meanwhile chop onion and peel garlic.
- Lightly oil cast iron skillet. Put inside oven and preheat both together to 425 degrees Fahrenheit.
- After resting, pat chicken dry again, then brush with melted butter. Season with salt and pepper.
- Place half of onion and garlic in preheated skillet, and the other half inside the chicken cavity. Place whole chicken breast side up in center of skillet.
- Roast at 425 degrees Fahrenheit for 13-15 minutes per pound of chicken. (For example, a 4 lb bird will roast for between 50 and 60 minutes.) For best results, face the breasts to the back of the oven.
- Chicken is finished roasting when it's golden on the outside and the internal temperature reads 165 at the thickest part - either the thigh joint near the breast or the center of the breast.
- Let chicken rest for 20 minutes before carving to keep juices from running out and leaving the meat dry.
Optional Pan Gravy:
- After chicken is removed from the skillet, loosen stuck bits from the bottom of the pan and strain drippings.
- Return drippings to the pan and put on medium heat.
- Add 1 cup of chicken broth to the drippings and bring to a simmer.
- Mix 1/4 cup of broth with 2 Tbsp of flour or cornstarch to form a slurry. When drippings and broth are simmering, add the slurry very gradually, stirring constantly with a whisk, until mixture is the desired thickness.
I hope this recipe will help make your from-scratch kitchen life a little easier and more delicious. If you love an old-fashioned approach in the kitchen and the home, join our community for regular updates, recipes, and more!


